

Coffee Sensory Evaluation at Home Kit: 2026 Review
Table of Contents
- What a Coffee Sensory Evaluation at Home Kit Actually Includes
- Coffee Cupping Protocol for Beginners: A Step-by-Step Walkthrough
- How to Identify Coffee Flavor Notes Using Aroma and Taste Training
- Using a Coffee Tasting Score Sheet Template for Consistent Results
- Best Cafe de Mattier Sample Packs for Palate Training
- DIY Sensory Training Alternatives That Cost Almost Nothing
- Common Mistakes in Coffee Sensory Evaluation at Home
- Frequently Asked Questions
Last Updated: September 17, 2026

What a Coffee Sensory Evaluation at Home Kit Actually Includes
A coffee sensory evaluation at home kit is a set of tools that lets you taste, smell, and score coffee the way a professional cupper does. A proper kit gives you reference points, and reference points turn vague impressions into repeatable tasting notes.
Aroma Vials and Flavor Standards
Aroma vials hold concentrated scent references, often built from essential oils or lab-made compounds that mimic specific coffee notes. You smell each vial, then match it against a cup. This is olfactory training, and it works because smell drives most of what you call "taste" in coffee.
Cupping Bowls, Spoons, and Scorecards
The physical gear matters less than people think, but it isn't irrelevant. A cupping bowl should be wide-mouthed, identical across your set, and deep enough to hold the aroma. A proper cupping spoon holds about 8-10 ml, enough to slurp without flooding your mouth.
| Component | What It Does | Skip It If |
|---|---|---|
| Aroma vials | Builds a scent reference library | You already know 20+ distinct aromas |
| Cupping bowls | Standardizes aroma and temperature | You only brew single cups |
| Cupping spoons | Controls sip size for slurping | You're tasting espresso only |
| Scorecards | Turns impressions into comparable data | You never track results over time |
Coffee Cupping Protocol for Beginners: A Step-by-Step Walkthrough
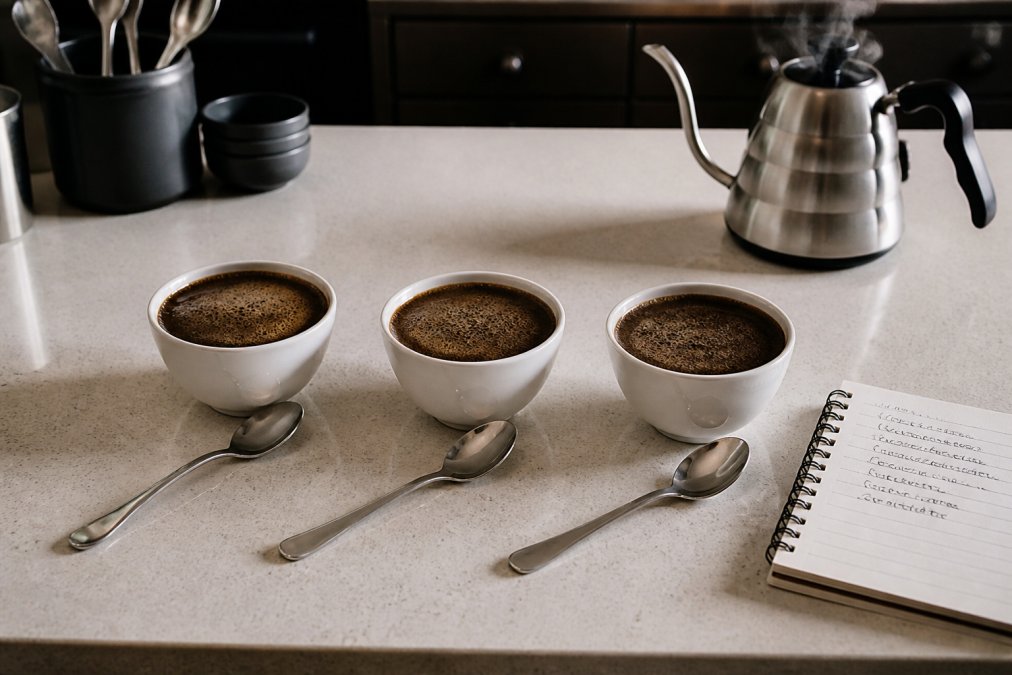
The coffee cupping protocol for beginners is simple: grind, smell, pour, break, slurp, score. Five steps, roughly 20 minutes, no special equipment beyond what's in your kit. What separates a useful session from a wasted one is the numbers behind each step.
What You'll Need Before You Start
- Fresh whole-bean coffee, roasted within the last two weeks
- A burr grinder set to a medium-coarse grind
- Filtered water heated to just off boiling
- Your cupping bowls, spoons, and scorecards
- A clean, quiet space with no strong competing smells
Skip the perfume, scented candle, and garlic from lunch. Sensory work is fragile.
The Standard Ratios and Temperatures
The Specialty Coffee Association's cupping standard uses a fixed ratio so every cup is comparable: 8.25 grams of coffee to 5.07 fluid ounces (150 ml) of water, ground medium-coarse, with water poured at about 200°F (93°C), roughly 1:18 by weight. Without a scale, two slightly heaped tablespoons gets you close, but a $15 kitchen scale is the cheapest upgrade to your consistency.
The Five Steps of a Basic Cupping Session
- Grind and smell. Grind a fixed dose per bowl and smell the dry grounds within a minute or two. This is fragrance, and it fades fast, volatile compounds escape the moment the grounds hit air.
- Pour and steep. Add water just off boiling, filling each bowl to the rim, and start a timer. Let it steep undisturbed for four minutes. Smell the wet crust that forms on top. This is aroma, usually richer than the dry fragrance.
- Break the crust. At the four-minute mark, use your spoon to push through the floating grounds and inhale deeply as the crust falls. The trapped gases release all at once, this is the most aromatic moment of the whole session.
- Skim and slurp. Skim the remaining grounds and foam off the surface with two spoons, then take a spoonful and slurp it hard. Slurping spreads coffee across your palate and pushes aroma into your nose, where most of what you call "taste" happens.
- Score and repeat. Wait for the cup to cool, then taste again. Cooler coffee reveals notes that heat hides.
How to Run a Side-by-Side Session
Cupping one coffee teaches you what it tastes like. Cupping two or three at once teaches you what makes them different, the actual skill. Set up one bowl per coffee, label the bottoms (not the rims), and keep dose, grind, water, and timing identical across every bowl. Taste in the same order each round so the first cup doesn't get an unfair advantage from a fresh palate.
How to Identify Coffee Flavor Notes Using Aroma and Taste Training
Learning how to identify coffee flavor notes is a memory exercise, not a talent. You're not inventing flavors, you're matching what's in the cup against what you've smelled before. The catch: most people have never deliberately smelled the references they're trying to detect, so the match never fires.
Build a Reference Library From Your Own Kitchen
You don't need aroma vials to start, just references you can smell on demand. Pull these from your cabinets, smelling each deliberately and naming it out loud:
- Fruity: lemon zest, orange peel, frozen raspberries, dried apricots, apple
- Nutty and cocoa: almond extract, peanut butter, cocoa powder, dark chocolate
- Sweet and caramel: brown sugar, maple syrup, honey, vanilla extract
- Spice: cinnamon, clove, nutmeg, black pepper
- Floral and tea: jasmine tea, Earl Grey, dried chamomile, rose water
- Earthy: fresh soil from a potted plant, cedar, tobacco leaf
The Blind-Tasting Drill That Actually Builds Skill
Once you have references, test yourself blind. Have someone pour two coffees without telling you which is which, or label cups with tape and shuffle them. Write notes on both, then compare. This is tasting calibration, the single most useful habit you can build without spending money.
Connect What You Taste to How You Brew
- Sour, thin, or salty cup: grind finer in small steps, or raise your water temperature a few degrees
- Bitter, ashy, or drying cup: grind coarser, or drop your water temperature
- Weak but not sour: increase your coffee dose rather than changing the grind
- Muddy or flat: check your water, very hard or heavily chlorinated water flattens acidity and mutes aroma
Three habits speed up palate development: smell your spice rack, fruit bowl, and tea shelf weekly; write notes immediately, since memory fades in minutes; and taste the same bean twice in one week and compare notes.
Using a Coffee Tasting Score Sheet Template for Consistent Results
A coffee tasting score sheet template separates a hobby from a practice. Without it, you're drinking coffee and forming opinions; with it, you're building data.
Best Sellers Sample Pack: 6Bean →
| Category | What You're Scoring | Scale |
|---|---|---|
| Fragrance/Aroma | Dry and wet scent quality | 6-10 |
| Flavor | Overall taste impression | 6-10 |
| Acidity | Brightness and liveliness | 6-10 |
| Body | Weight and texture on the palate | 6-10 |
| Sweetness | Perceived sweetness level | 6-10 |
| Balance | How well elements work together | 6-10 |
| Aftertaste | Length and quality of finish | 6-10 |
Best Cafe de Mattier Sample Packs for Palate Training
The fastest way to build a palate is to taste the same roast style across different origins, then taste different roast levels of the same origin. Cafe de Mattier's sample packs are designed to help with this. Each 2oz pack gives you enough coffee for two or three cupping sessions without committing to a full bag.
Single Origin Favorites Sample Pack: Best for Comparing Terroir
This six-pack runs $24.99 and covers Brazil, Colombia, Costa Rica, Ethiopia, Honduras, and Tanzania. The spread includes a Brazilian medium roast with cocoa notes, an Ethiopian natural with milk chocolate and fruit, and a Tanzanian medium-light with pear and jasmine.
Best Sellers Sample Pack: Best for Roast-Level Calibration
Also $24.99, this pack leans toward blends and roast variety: a dark-roast house blend, a dark-and-medium Cowboy Blend with cocoa, caramel, and vanilla tones, a medium Breakfast Blend, plus single origins from Peru, Mexico, and Bali.
DIY Sensory Training Alternatives That Cost Almost Nothing
You don't need a kit to start training, you need references.
A few more low-cost drills:
- Cup the same bean at two different brew ratios and note the difference
- Taste coffee alongside a piece of dark chocolate and identify the shared notes
- Keep a flavor wheel printed on your counter and trace your impressions back to it
Common Mistakes in Coffee Sensory Evaluation at Home
The biggest mistake is tasting too many coffees at once. Palate fatigue kicks in fast, after four or five cups, your notes blur and you write the same descriptors for everything.
Frequently Asked Questions
What is included in a professional coffee sensory kit?
Most professional kits include aroma vials or essential oil standards that represent common coffee flavor notes, a set of identical cupping bowls, a cupping spoon, and a printed scorecard aligned with Q-grader cupping protocol. Some kits add flavor wheel references and calibration samples. For home use, you can build a similar setup with a few matching bowls, a spoon, and a sample pack of single-origin coffees to practice aroma recognition and flavor identification.
How do I practice coffee cupping at home?
Start with 8 grams of coffee per 150 milliliters of water just off boil. Grind coarse, pour, and let it steep for four minutes. Break the crust with a spoon, skim the foam, then slurp from the spoon so the coffee coats your whole palate. Taste each coffee at hot, warm, and room temperature. Write down what you notice on a coffee tasting score sheet template, and repeat with different origins to build sensory memory.
Are aroma kits worth the investment for coffee enthusiasts?
Aroma kits help you name what you're already tasting. If you can detect something fruity but can't decide between berry and citrus, a reference vial sharpens that vocabulary. The trade-off is cost: a full professional kit can run several hundred dollars. A practical middle path is to buy a single-origin sample pack and cup the same coffee alongside a known reference, like a piece of dark chocolate or a slice of green apple, to calibrate your palate without the kit price.
How can I improve my coffee tasting skills without formal training?
Cup the same coffee repeatedly across different brew methods and note how acidity, body, and mouthfeel shift. Keep a written log so you can track sensory calibration over weeks, not days. Try the DIY approach: smell and taste common reference foods alongside your coffee. Sample packs of single-origin coffees from different regions give you a wide range of flavor standards to compare, which builds sensory acuity faster than drinking the same blend every morning.
What are the basic tastes used in coffee sensory evaluation?
Coffee evaluation uses sweet, sour, bitter, salty, and umami as the five basic tastes, plus aroma recognition through the olfactory system. In practice, sweetness and acidity dominate specialty coffee tasting notes. Body and mouthfeel are tactile, not taste, which is why they're scored separately on a coffee tasting score sheet. Bitterness and astringency usually signal defects or over-extraction, while clean acidity and sweetness point to higher coffee quality.